Preparing your local Windows 10 system – 45 minutes
To deploy Pega Platform using a local Windows 10 system on which you can run commands with administrator privileges, prepare your system with required applications and configuration files that you need for your deployment. By preparing your system, you can complete the deployment without having to pause to install a Windows application or prepare a configuration file.
Before you begin
To prepare a Wndows 10 system, it is assumed:
-
You have a basic familiarity with running commands from a Windows 10 PowerShell with administrator privileges.
-
You have appropriate administrative privileges to install programs on your local computer.
-
You use the open source packaging tool Chocolatey to install applications onto your Windows laptop. For more information, see How Chocolatey Works.
-
You have basic familiarity with a GitHub account with which you download a Pega-managed GitHub repository that contains configuration files and scripts that support installing Pega Platform and deploying it in the Kubernetes cluster.
Creating a local folder to access all of the configuration files
Deploying with Helm requires you to run commands from a specific folder on your local system. To ensure you use the correct filepath, these instructions always use the reference <local filepath>\<platform>-demo folder when you extract files to a folder or run commands from a folder.
To stay consistent with the instructions, you can create a folder named <platform>-demo on your local system at the top level of your Windows user folder. This way, you associate the generic <local filepath>\<platform>-demo references to the folder C:\\Users\\\<your username\>\\\<platform\>-demo that is specific to your local system.
To create this folder, open a Windows PowerShell command prompt with administrator privileges and enter:
`$ mkdir C:\Users\<Windows-username><platform>-demo`
Where <platform>-demo is:
-
For the AKS runbook,
AKS-demo -
For the EKS runbook,
EKS-demo -
For the TKGI runbook,
TKGI-demo -
For the Openshift runbook,
Openshift-demo
Currently there is no runbook for running on the Google Kubernetes Engine (GKE) using the Windows 10 Google SDK. To set up a system for a deployment on GKE, see Prepare a local Linux system – 45 minutes.
You are ready to continue preparing your local system.
Installing required applications for the deployment
The entire deployment requires the following applications to be used during the configuration process; therefore, you should prepare your local system with all of the applications before you start your deployment:
- Helm (installed using Chocolatey, a Windows package manager application, or your preferred equivalent.)
- kubectl (installed using Chocolatey, a Windows package manager application, or your preferred equivalent.)
- Docker (install using Docker for windows)
- unzip (or an equivalent to extract files from .zip archive files.)
- az cli (only for AKS deployments)
- AWS IAM Authenticator for Kubernetes (only for EKS deployments)
- eksctl (only for EKS deployments)
- pks cli (only for TKGI deployments)
Some of the required applications are binary files that you download from the organization’s download area; you can install other applications by using a Windows package manager application such as Chocolatey.
To install Chocolatey for the first time on your local system, follow these steps which are sourced from the Install Chocolatey page. Skip steps 1 - 3 if you already have it installed.
-
Open a Windows PowerShell command prompt with administrator privileges.
-
To ensure your PowerShell commands run without restrictions, enter:
$ Get-ExecutionPolicy -
To install Chocolatey and allow the use the use of appropriate security scripts it uses during installation of applications, enter:
$ Set-ExecutionPolicy Bypass -Scope Process -Force; iex ((New-ObjectSystem.Net.WebClient).DownloadString('https://chocolatey.org/install.ps1'))The command returns messaging describing useful details and indicating a successful installation. You are ready to use Chocolatey to install each required application.
Installing Helm and the kubernetes CLI commands:
Pega supports using Helm version 2.1 and later and the Kubernetes Command Line Interface (CLI) 1.15 and later. The latest runbooks use Helm version 3.0 and kubernetes-cli 1.17.0. It is recommended to use these versions. If you use Helm 2.x, some of the commands differ slightly for Helm 2.x.
The default Helm version available in Chocolatey is 3.0.x; the version of kubernetes-cli used in the runbooks is version 1.17.x.
Enter the choco install command listed for each application into your PowerShell command prompt as shown:
-
To install Helm: in the PowerShell command prompt, enter:
$ choco install kubernetes-helm
If a prompt to run the script appears, enter Yes.
For additional information, see Helm documentation.
-
To install Kubernetes Command Line Interface: in the PowerShell command prompt, enter:
$ choco install kubernetes-cli
If a prompt to run the script appears, enter Yes.
The kubernetes-cli application includes the kubectl command.
For details about installing on Windows 10 and supported installation methods, see Install kubectl on Windows.
For Amazon EKS only: Pega recommends deploying your EKS cluster for your Pega Platform deployment using the AWS eksctl command line utility for creating and managing clusters on Amazon EKS.
To install eksctl: in the PowerShell command prompt, enter:
$ choco install eksctl
If a prompt to run the script appears, enter Yes.
PS C:\Users\aciut> eksctl version [ℹ] version.Info{BuiltAt:””, GitCommit:””, GitTag:”0.13.0”}
For Amazon EKS only: Pega recommends using the AWS IAM Authenticator for Kubernetes to authenticate with your Kubernetes cluster using your AWS credentials.
To install AWS IAM Authenticator for Kubernetes: in the PowerShell command prompt, enter:
$ choco install aws-iam-authenticator
If a prompt to run the script appears, enter Yes.
Confirm the AWS CLI that comes withe the AWS IAM Authenticator for Kubernetes installation.
$ aws --version
aws-cli/1.16.272 Python/3.6.0 Windows/10 botocore/1.13.8
For AKS only: installing the Azure CLI
To install the Azure CLI using a Windows PowerShell command prompt with administrator privileges, enter:
$ Invoke-WebRequest -Uri https://aka.ms/installazurecliwindows -OutFile .\\AzureCLI.msi; Start-Process msiexec.exe -Wait -ArgumentList '/I AzureCLI.msi /quiet'
The prompt returns when the installation is completed.
For details about installing the Azure CLI on a Windows system, see Install Azure CLI on Windows.
For TKGI only: installing the TKGI CLI
Install the PKS CLI binary executable file from the VMware Enterprise PKS support site that you run with Windows administrator permissions during the TKGI deployment steps:
-
Navigate to VMware Tanzu Network and log in.
- Click Tanzu Kubernetes Grid Integrated Edition.
- Select your desired release version from the Releases dropdown.
- Click TKGI CLI.
- Click TKGI CLI - Windows to download the Windows executable file.
- Rename the downloaded binary file to
tkgi.exe. - Move the binary file into your
PATH. - Run
tkgi –versionto verify the version of your TKGI CLI installed locally.
These instructions were mostly sourced from the Installing the TKGI CLI.
Installing Docker Desktop on Windows 10
In order to build a docker installation image in the section, Deploying Pega Platform using Pega-provided docker images, you must install the Community Edition (CE) of Docker for Windows. To do so, you must download, install, and log into Docker for Windows in order to complete the setup on your local system. For your convenience, the instructions available on the Docker website are included in this this section of this document. Deploying Pega Platform using Pega-provided docker images
- Download the installer (Docker for Windows Installer.exe) from download.docker.com.
Locate the executable file that downloads to your local system.
-
Run the Docker for Windows Installer.exe installer using administrator privileges.
-
Follow the install wizard to accept the license, authorize the installer to make changes on your computer, and proceed with the install.
As part of the initial installation, you must authorize Docker.app with your system password during the install process. The Docker application requires access to enable Hyper-V and containers, install networking components, and links to the Docker apps. The installation requires several reboots to install/enable these features. Docker Desktop takes 1-3 minutes to display on initial start.
-
In the Configuration window, do not select Use Windows containers instead of Linux containers (this can be changed after the installation) and click OK.
-
Click Close.
-
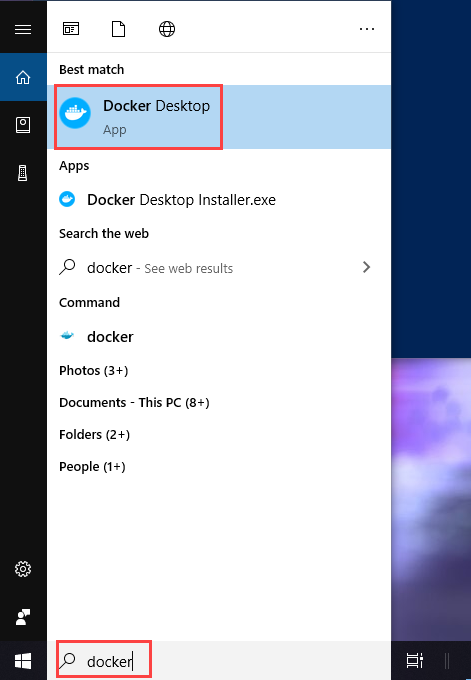
To complete your Docker Desktop setup, in the windows search bar, enter “docker” in the search field and select the Docker Desktop app in the search results.
- Log into the Docker Desktop application when you are prompted, using your DockerHub credentials.
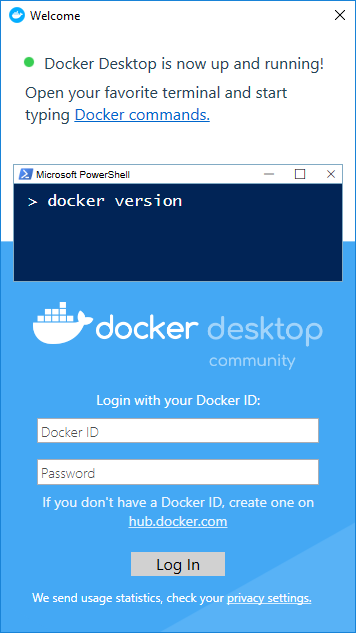
After you log in, the docker CLI is available from a Windows PowerShell command prompt. These instructions were mostly sourced from the article, https://docs.docker.com/v17.09/docker-for-windows/install/.
Creating SSL certificates for HTTPS load balancer on a Kubernetes ingress
When you configure an HTTPS load balancer through a Kubernetes ingress, you can configure the load balancer to present authentication certificates to the client. After you generate your certificates and corresponding private keys using any SSL Certificate creation tool, you pass the certificates and private keys to your Kubernetes ingress using the method supported for the specific environment. For Pega support details, see the Addons Helm chart.
Use the generation method best suited to your company standards. The following steps create one or more certificates and private keys for a host name using a manually verified domain.
-
Navigate to the certificate generator, such as SSL For Free.
-
Enter your host name for which you are creating a certificate and click Create FreeSSL Certificate.
-
To validate the certificate manually, click Manual Verification (DNS).
The Manually Verify Domain (DNS) option displays.
-
Click Manually Verify Domain.
The Update DNS Records screen displays a name/host record, an associated verification value.
-
Using the DNS lookup management system of your choice, associate the generated name/host record with the verification value. For instance:
Name          :   _acme-challenge.demotest.dev.pega.io
Type          :   TXT
TTL (Seconds) :   1
Value         :  "ezEiD0Lkvvzlgfaqdohe3ZcX7s4vVF6hHlBBKI3sL38"
With the host name associated with the verification value, wait several minutes to ensure the configuration is established.
-
Click the link for name/host record.
A new page displays the status of the connection.
-
When successful, you will see that the link returned the correct value and you can generate the SSL certificate files.
If it is not successful, you may have to wait longer for the DNS lookup to correctly associate the verification value with the host name; if it continues to not work, you may need to update your DNS settings.
-
In the main page of SSL for Free, click Download All SSL Certificate Files and save the certificate file and private key file in the <platform>-demo folder you have already created on your local system.
You will manage these certificates in the environment to which you deploy Pega Platform. For environment-specific details, see the Deploying Pega Platform using the command line section in the runbook for that environment
Deploying Pega Platform using Pega-provided docker images
To deploy Pega Platform, you must pull several required images from the Pega-managed Docker image repository and push them into your private Docker registry from where you reference them in the Pega Helm chart. For more information, see Pega Helm chart.
Pegasystems uses a standard naming practice of hostname/product/image:tag. Pega images are available from the host site, pega-docker.downloads.pega.com. Pega maintains the required Docker images for Client-managed Cloud deployments of Pega Platform:
| Name | Description | Tags |
|---|---|---|
platform/installer |
A utility image with which you install all of the Pega-specific rules and database tables in the “Pega” database that you have configured for your deployment. This installation is required before a deployment can take place. | <version> |
platform/pega |
(Download required) Deploys Pega Platform with its customized version of the Tomcat application server. | <version> or <version>-YYYYMMDD |
platform/clustering-service |
(Download required) Deploys the required clustering service(Hazelcast) for the caching capabilities in Pega platform as a backing service. This Docker image contains Hazelcast clustering Service. Note: This feature is supported only from platform version “8.6” to deploy the platform in client-server Hazelcast model. Embedded deployment would not be supported in future platform releases. |
<version> |
platform-services/search-n-reporting-service |
(Download required) Deploys the latest Pega generation of search and reporting capabilities in Pega Infinity on dedicated, backing service nodes. This Docker image contains Pega Search and Reporting Service (SRS) and allows you to optimize Elasticsearch processing in your Pega deployment. For more information about this service, see External Elasticsearch in your deployment. | <version> |
platform/search |
(Deprecated) Deploys the deprecated legacy external client-server solution for Elasticsearch. The Docker image contains an Elasticsearch plug-in configured to directly connect to your Pega Platform environment. Note: The Elasticsearch plug-in is deprecated starting in Pega Platform version 8.8. Use the platform-services/search-n-reporting-service to deploy the Search and Reporting Service (SRS) instead. For more information, see External Elasticsearch in your deployment. |
<version> or <version>-YYYYMMDD |
When you decide on a Pega Platform version for your downloaded Docker images, you should use the same version tag for each of the images you download.
For the platform/installer image, the :tag represents the version of Pega you want to install, for example the tag :8.5.1 will install Pega Platform version 8.5.1.
For platform/pega and platform/search images, Pega also offers an image with a version tag appended with a datestamp using the pattern pegaVersion-YYYYMMDD to indicate the version and the date that Pega built the image. For example, if you pull the platform/pega with a tag, pega:8.5.1-20201026, the tag indicates that Pega built this 8.5.1 image on 26 October 2020. Using the version tag without the datestamp will always point to the most recently built image for that version.
For Pega Platform 8.6 and later, Pega supports a new client-server deployment model using a cluster of nodes running Hazelcast as server,
to which the Pega nodes connect as client. This new client-server deployment model introduces improved stability for Pega Platform
deployments that use a large number of nodes, since it introduces independent scalability for both servers and clients in Pega Platform.
Because of the inherent stability and scalability of this model, Pega recommends that all clients deploying Pega platform 8.6 and later adopt
this client-server model using Hazelcast. Embedded deployment would not be supported in future platform releases.
To deploy Pega platform and Hazelcast using this client-server deployment model, you must download and push the Clustering Service Docker image,
platform/clustering-service to your Docker repository and use with the Hazelcast subchart under Pega charts.For the platform/clustering-service image, the :tag represents the version of Clustering Service you want to install, for example the tag :1.0.3 will install clustering-service version 1.0.3.
The Docker image platform-services/search-n-reporting-service is used with the Search and Reporting Service under backing services. The SRS subchart deployment provisions the latest generation of search and reporting capabilities in Pega Infinity. To configure this service, see External Elasticsearch in your deployment.
The docker image format is different for backing services and does not follow the datestamp pattern. For installations of or upgrades to Pega Infinity 8.6, you may configure Docker image platform-services/search-n-reporting-service with tag <srs-version> compatible with the Pega version as provided in compatibility matrix.
The datestamp ensures that the image you download includes the changes that Pega engineering commits to the repository using pull requests by a certain date. While Pega builds the most current patch version of each minor release one time each day, Pega makes the last five daily-built images available for client downloads. After Pega releases a new patch version, the prior patch version no longer receives daily builds with a datestamp tag.
After you obtain access to the Pega-provided host repository and pull each image, you can re-tag and push each of the Pega-provided images to your preferred Docker registry to make them available to the deployment as described in the next section. You then provide your registry URL, credentials, and reference each image appropriately in the Pega Helm chart. You can find example usage details for referencing the images in a repository in the appropriate runbook for your type of deployment.
These images do not expire, and you can keep them in your repository for as long as you require.
Pega also supports experienced client’s ability to build your own installer docker image using components of a full Pega Platform 8.3 or later distribution image to install or upgrade the Pega Platform database. If you build your own installation image, you do not have to download the Pega-provided docker image listed in the table. For details on building your own image, see Building a Pega Platform installer docker image.
Downloading a Pega Platform installer docker image
Clients with appropriate licenses can log in to the image repository and download docker images that are required to install the Pega Platform onto your database.
Requesting access to the Pega Docker repository
-
In the browser of your choice, navigate to the Pega Digital Software Delivery site.
-
Log into the Pega Community site with the credentials your Pega representative provided.
-
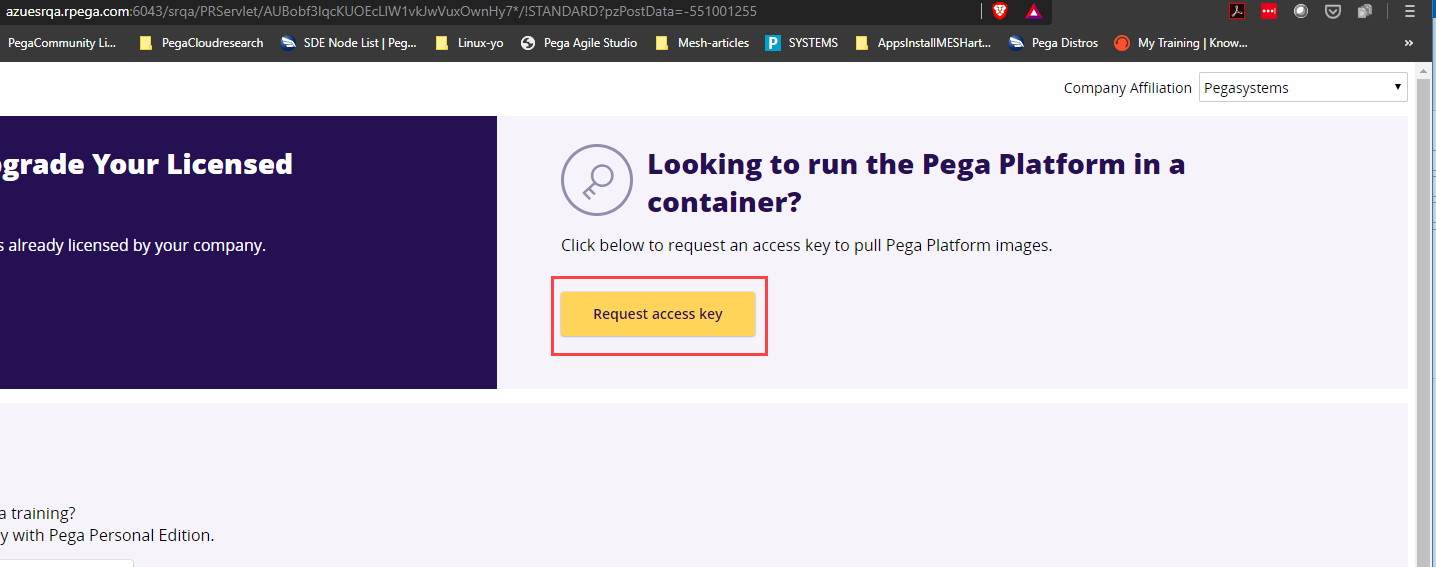
In the Download and Upgrade Licensed Software area, click New request.
-
In the right side of the page, click Request access key.
-
Enter your credential details.
After you enter valid credentials, you recieve confirmation that an email is on the way.
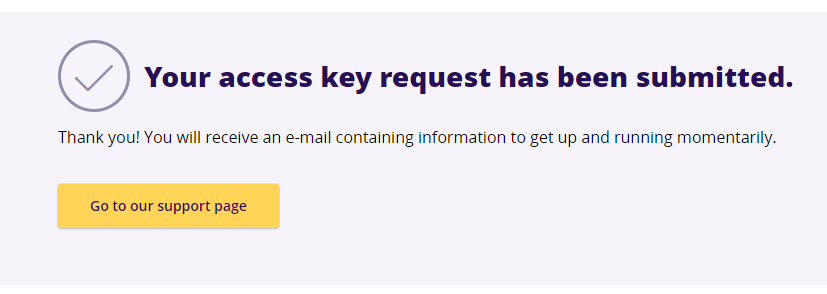
- Open the email you received. It will look similar to the image shown.
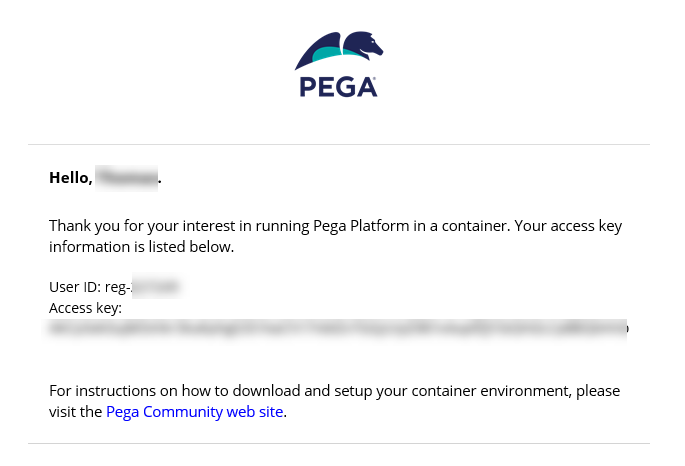
- Save your access key to a text file the
\ -demo folder so you can pass it into your docker login command to ensure the it will not display in your bash history or logs.
Downloading and managing Pega Platform docker images
With access credentials to the Pega Docker image repository, you log in, download each required image, retag each image appropriately, and finally upload each image to your own Docker registry. For an overview of tagging and managing Docker images, see the Docker article, Deploy a registry server.
Important: Use the same Docker image tag to ensure you download compatible images.
Pega supports any of the following Docker image registries from which your deployment will access the Pega-provided Docker images. For details about setting up your choice of Docker registry, click the link for that registry’s documentation:
- DockerHub
- Amazon elstic Container Registry (ECR)
- Azure Container Registry
- Google Cloud Container Registry
With a Docker registry configured, clients push their Pega-provided images to their registry so it is available to the deployment. Clients must also provide their registry URL, credentials, and then reference each image appropriately in the Pega Helm chart.
Examples:
# If using a custom Docker registry, supply the credentials here to pull Docker images.
  docker:
    registry:
      url: "YOUR_DOCKER_REGISTRY"
      username: "YOUR_DOCKER_REGISTRY_USERNAME"
      password: "YOUR_DOCKER_REGISTRY_PASSWORD"
      # Docker image information for the Pega docker image, containing the application server.
    pega:
      image: "<Registry host name:Port>/my-pega:<Pega Platform version>"

# Elasticsearch deployment settings.
pegasearch:
  image: "<Registry host name:Port>/my-pega-search:<Pega Platform version>"
  memLimit: "3Gi"
  replicas: 1

# Pega Installer settings.
installer:
  image: "<Registry host name:Port>/my-pega-installer:<Pega Platform version>"
  adminPassword: "ADMIN_PASSWORD"

# Hazelcast settings (applicable from Pega 8.6)
# Note: Make sure to set this value as "false" in case of platform version below "8.6". If not set this will fail the installation.
hazelcast:
  image: "YOUR_HAZELCAST_IMAGE:TAG"
  enabled: true
  replicas: 3
  username: "SOME_USERNAME_FOR_AUTHENTICATION"
  password: "SOME_PASSWORD_FOR_AUTHENTICATION"
Example usage details for referencing your images in a repository are included in the appropriate runbook for your type of deployment.
It is a best practice to retag each of your Pega Docker images by including your registry host name and port; if this information is not included, the docker tag command uses the Docker public registry located at registry-1.docker.io by default. For more details and naming convention guidance, see the docker tag documentation.
-
In Windows PowerShell running with administrator privileges, navigate to the
\ -demo folder where you saved the file that contains your access key and log into the Pega-managed Docker image repository: $ cat <localfilepath>\<platform>-demo\<access-key-filename>.txt | docker login pega-docker.downloads.pega.com --username=<reg-XXXXX> --password-stdin Login Succeeded -
To download your preferred version of the
Pegaimage to your local system, specify the version tag when you enter:$ docker pull pega-docker.downloads.pega.com/platform/pega:<version> Digest: <encryption verification> Status: Downloaded pega-docker.downloads.pega.com/platform/pega:<version> -
Retag the
Pegaimage for your deployment with a customized tag that includes your Docker registry host name and a name that is useful to your organization, such as<Registry host name:Port>/my-pega:<Pega Platform version>.$ docker tag pega-docker.downloads.pega.com/platform/pega:8.4.0 <Registry host name:Port>/my-pega:8.4.0 -
To push the retagged
my-pegaimage to your registry, enter:$ docker push <Registry host name:Port>/my-pega:8.4.0 -
To download your preferred version of the
installerimage to your local system, specify the version tag when you enter:$ docker pull pega-docker.downloads.pega.com/platform/installer:<version> Digest: <encryption verification> Status: Downloaded pega-docker.downloads.pega.com/platform/installer:<version> -
To retag the
installerimage for your deployment with a customized tag that includes your Docker registry host name and a name that is useful to your organization, such as<Registry host name:Port>/my-pega-installer:<Pega Platform version>, enter:$ docker tag pega-docker.downloads.pega.com/platform/installer:8.4.0 <Registry host name:Port>/my-pega-installer:8.4.0 -
To push the retagged
my-pega-installerimage to your registry, enter:$ docker push <Registry host name:Port>/my-pega-installer:8.4.0 -
To download your preferred version of the
clustering-serviceimage to your local system, specify the version tag when you enter:$ docker pull pega-docker.downloads.pega.com/platform/clustering-service:<version> Digest: <encryption verification> Status: Downloaded pega-docker.downloads.pega.com/platform/clustering-service:<version> -
To retag the
clustering-serviceimage for your deployment with a customized tag that includes your Docker registry host name and a name that is useful to your organization, such as<Registry host name:Port>/my-clustering-service:<Clustering Service version>, enter:$ docker tag pega-docker.downloads.pega.com/platform/clustering-service:1.0.3 <Registry host name:Port>/my-clustering-service:1.0.3 -
To push the retagged
my-clustering-serviceimage to your registry, enter:$ docker push <Registry host name:Port>/my-clustering-service:1.0.3After you push these downloaded images to your private Docker registry, you are ready to begin deploying Pega Platform to a support Kubernetes environment. Use the runbook in this Github directory for your deployment.
-
To download your preferred version of the
search-n-reporting-serviceimage to your local system, specify the<srs-version>tag (refer compatibility matrix) when you enter:$ docker pull pega-docker.downloads.pega.com/platform-services/search-n-reporting-service:<srs-version> Digest: <encryption verification> Status: Downloaded pega-docker.downloads.pega.com/platform-services/search-n-reporting-service:<srs-version> -
To retag the
search-n-reporting-serviceimage for your deployment with a customized tag that includes your Docker registry host name and a name that is useful to your organization, such as<Registry host name:Port>/my-pega-srs:<Pega Platform version>, enter:$ docker tag pega-docker.downloads.pega.com/platform-services/search-n-reporting-service:<srs-version> <Registry host name:Port>/my-pega-srs:8.6.0 -
To push the retagged
my-pega-srsimage to your registry, enter:$ docker push <Registry host name:Port>/my-pega-srs:8.6.0 -
To download your preferred version of the
searchimage to your local system, specify the version tag when you enter:$ docker pull pega-docker.downloads.pega.com/platform/search:<version> Digest: <encryption verification> Status: Downloaded pega-docker.downloads.pega.com/platform/search:<version> -
To retag the
searchimage for your deployment with a customized tag that includes your Docker registry host name and a name that is useful to your organization, such as<Registry host name:Port>/my-pega-search:<Pega Platform version>, enter:$ docker tag pega-docker.downloads.pega.com/platform/search:8.4.0 <Registry host name:Port>/my-pega-search:8.4.0 -
To push the retagged
my-pega-searchimage to your registry, enter:$ docker push <Registry host name:Port>/my-pega-search:8.4.0